Step-by-Step Installation

1

Preparing the Downlight

⚠️ Important First Step

Carefully ease the downlight from the ceiling about 1mm

This slight gap will allow the Paint Guard to fit snugly between the ceiling and the light fixture, ensuring proper protection during painting.

2

Attaching the Spring or Elastic Band

Paint Guard with spring attachment demonstration
Choose Your Band

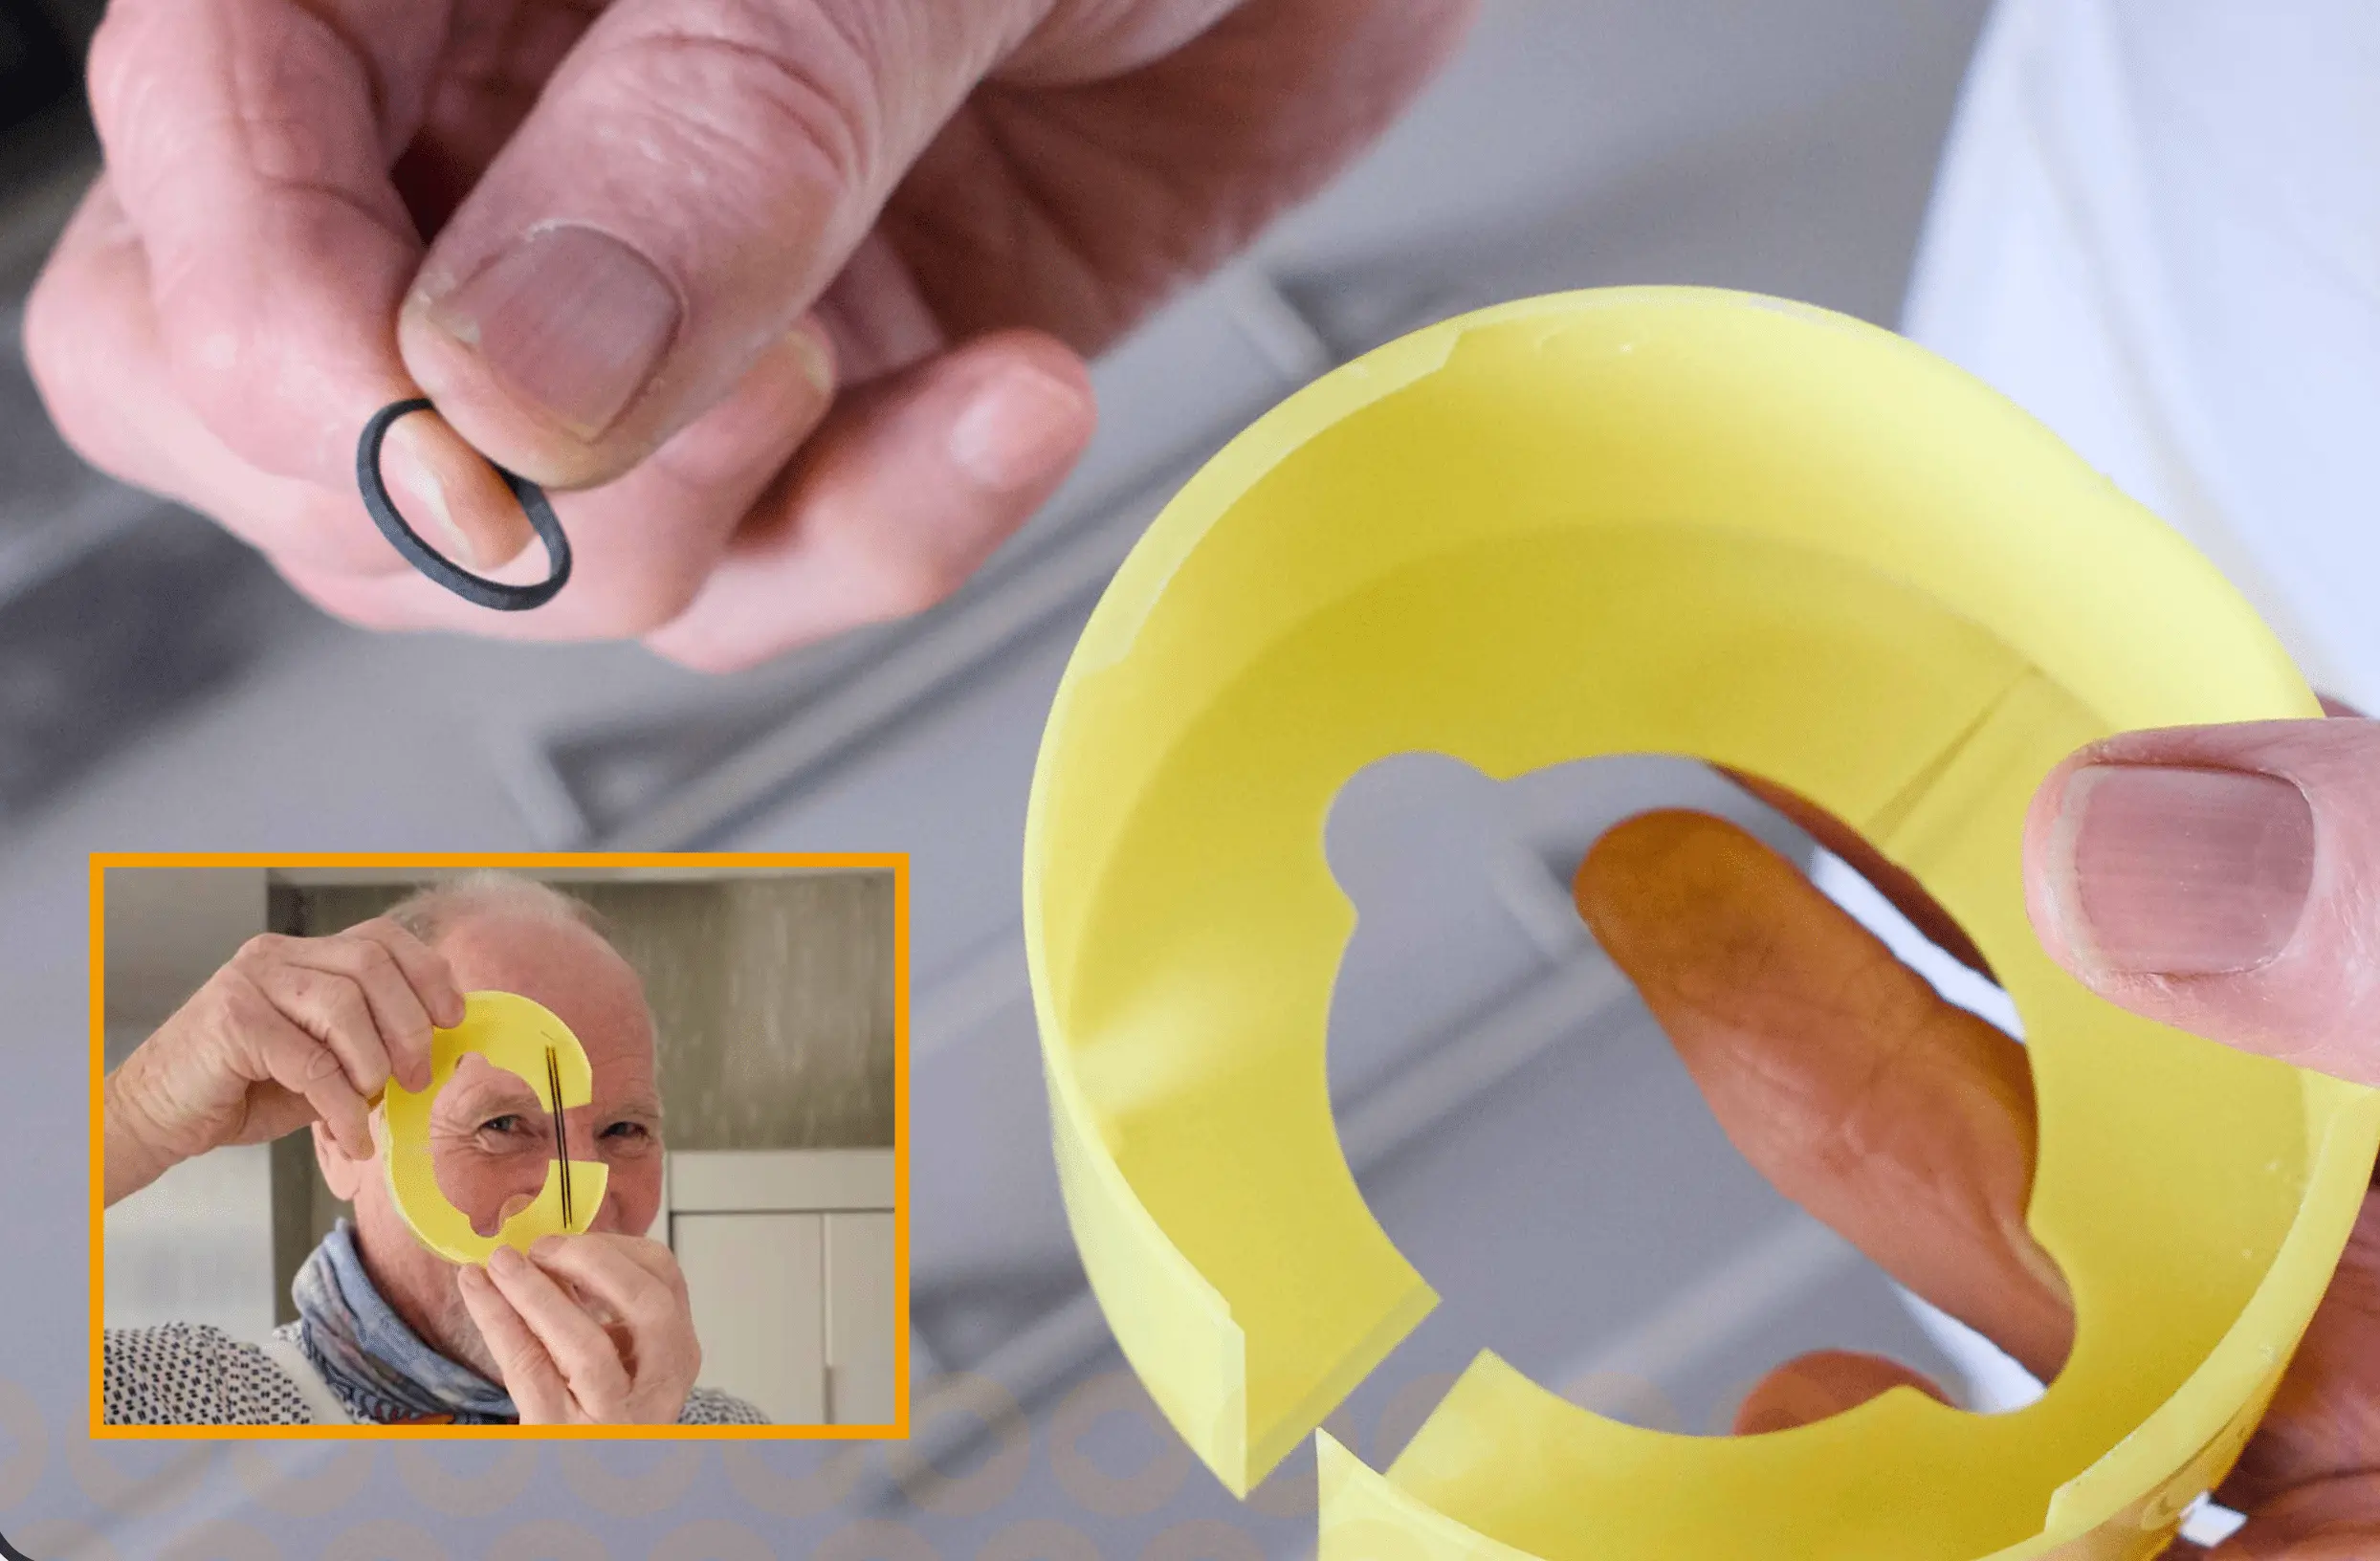
You can use either a spring or an elastic band; both work in the same way and provide secure attachment.

Secure the Band

Place one end of the spring or elastic band over one nodule on the Paint Guard, ensuring it's firmly attached.

Stretch and Secure

Stretch the spring or band over the opposite nodule and secure it. The Paint Guard is now ready for use.

3

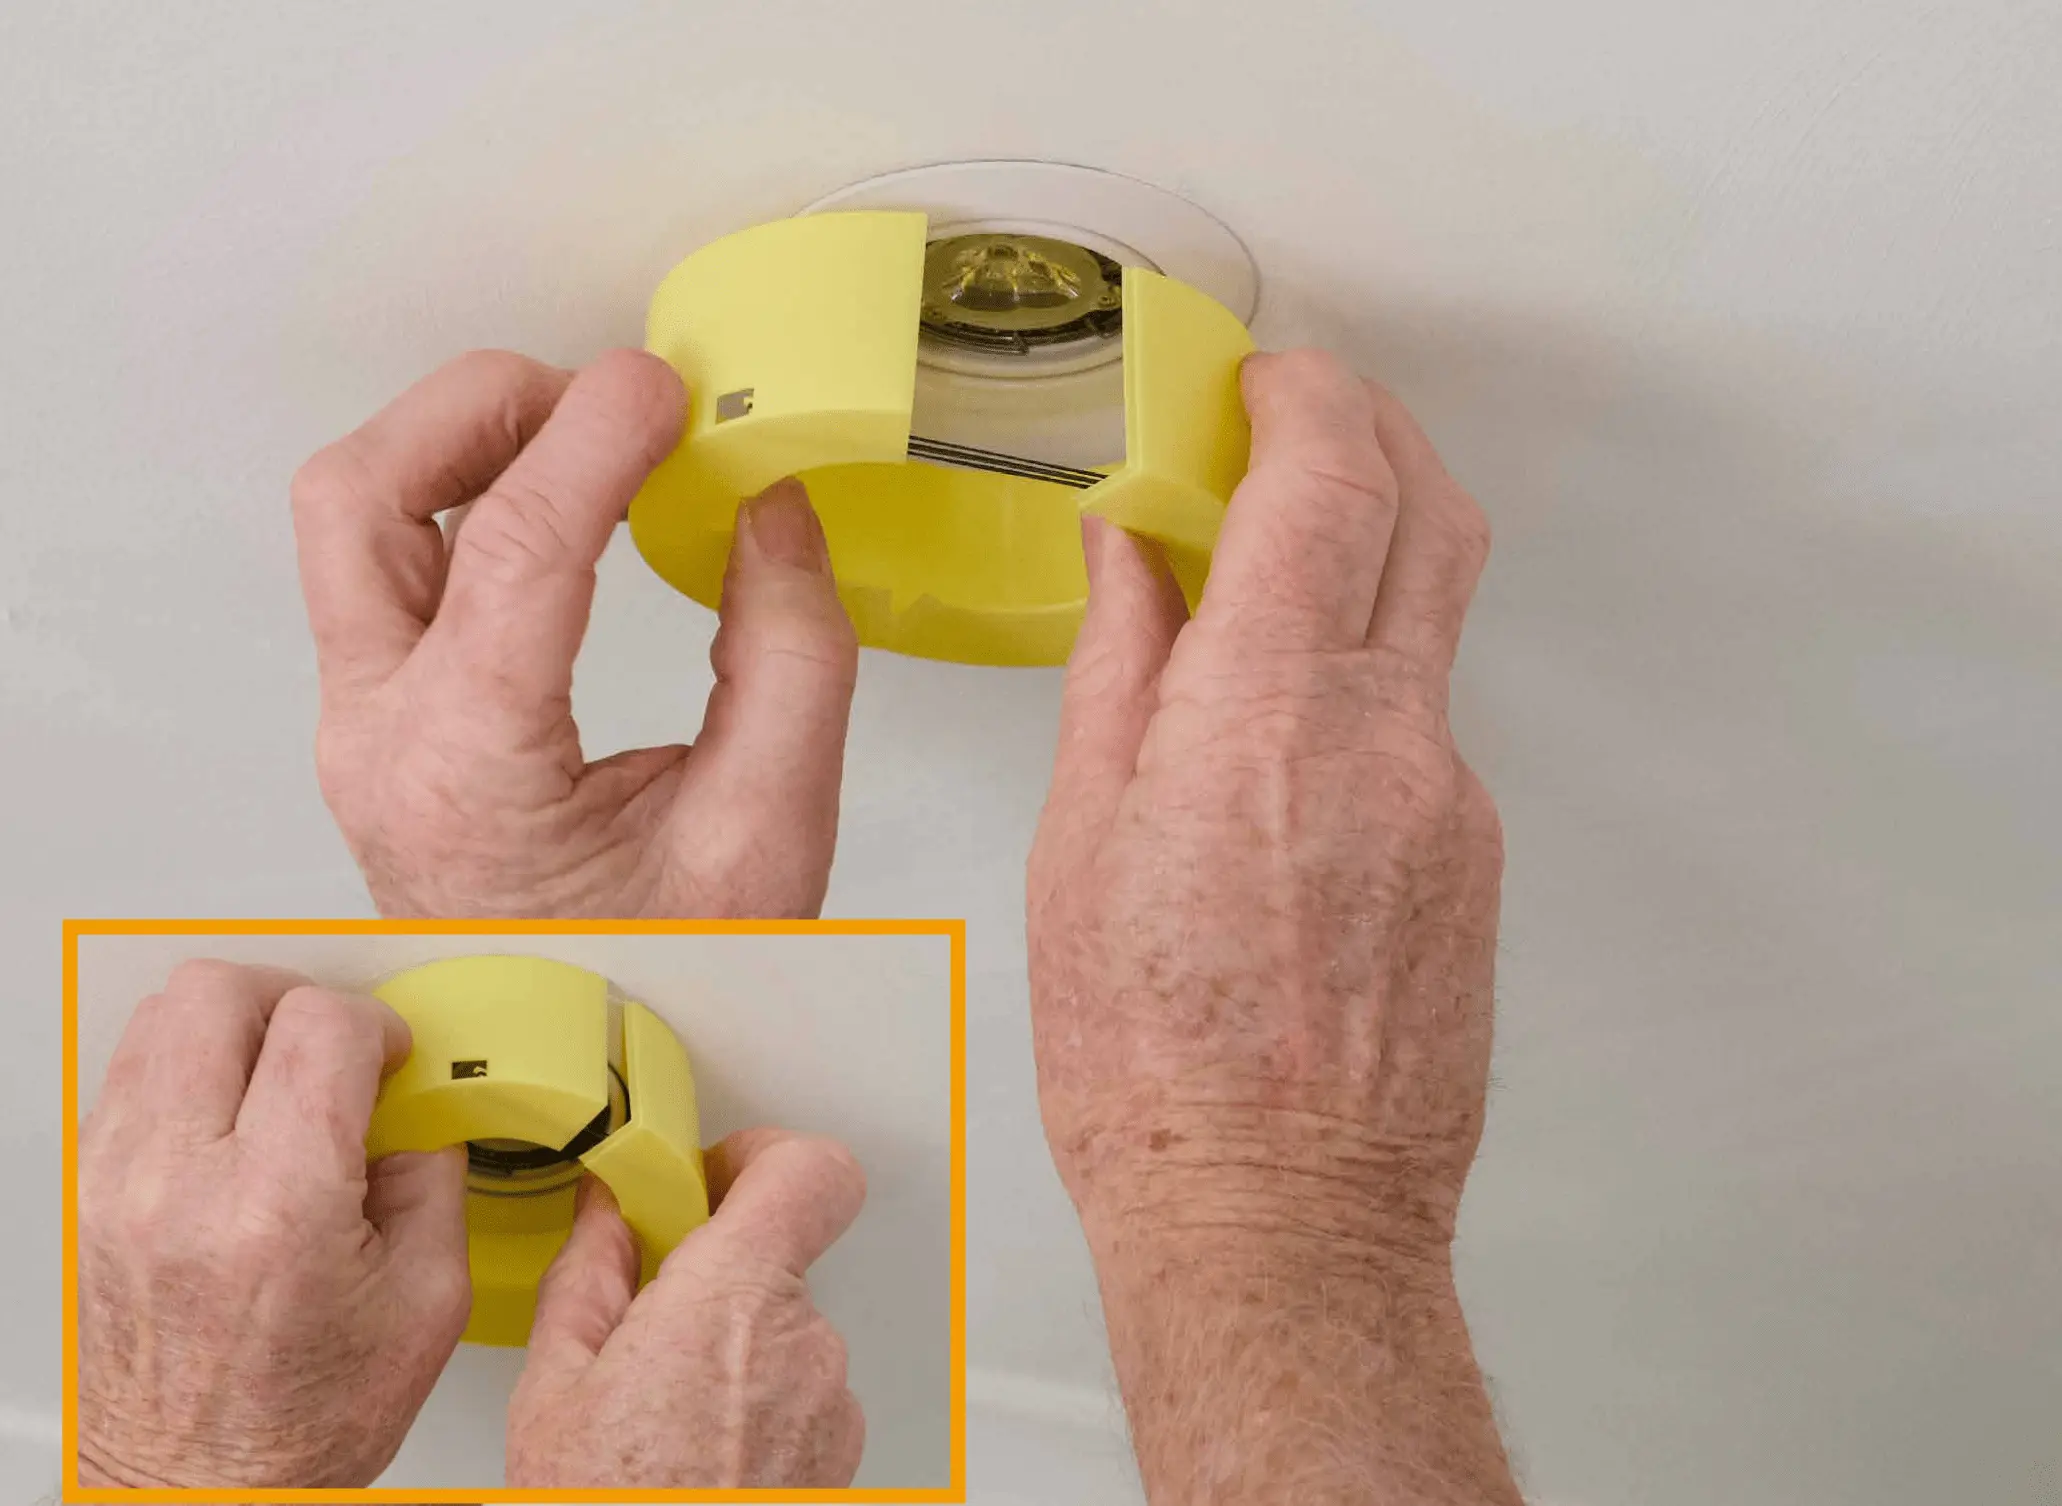
Installing the Paint Guard

Open the Paint Guard

Use the finger holes provided to open the Paint Guard with one or both hands. Ensure it is wide enough to cover the downlight completely.

Position the Paint Guard

Press the Paint Guard up against the ceiling, making sure the lips of the guard are positioned between the ceiling and the downlight. This ensures a tight seal around the light fixture.

Close the Paint Guard

Gently close the Paint Guard, ensuring it fits snugly around the downlight. The lips should remain flush against the ceiling for optimal protection.

4

Painting the Ceiling

Ready to Paint

With the Paint Guard securely in place, you can now paint the ceiling around the downlight. The guard will prevent paint from getting into the recessed area, keeping your light fixture clean and protected.

✓ Benefits During Painting:

  • Your fixture is protected and your ceiling is ready for painting
  • Lights still work normally during the painting process
  • Paint guard can be left in place until all coats are applied
  • No cleanup required around the light fixture

Removal & Cleaning

Paint Guard removal demonstration
Remove the Guard

After all coats of paint have been applied and dried, carefully remove the Paint Guard. Place your fingers in the finger holes provided and gently pull down slightly to open the guard. Remove it from the downlight with care.

Clean the Paint Guard

Clean the Paint Guard with warm water and mild soap to remove any paint residue. The device is fully reusable and can be stored for future painting projects.

⚠️ Safety Reminder

Important: Make sure you don't scratch the ceiling surface when removing the Paint Guard. Take your time and be gentle during removal.

Spraying Ceilings

Using Rubber Bungs

If spraying ceilings, there are rubber bungs ( sold separately ) that fit neatly into the opening at the top and side access holes of the Paint Guard.

Instructions:

  • Insert rubber bungs before spraying to prevent paint from entering the light fixture
  • Remove bungs after painting is complete to allow lights to function normally
  • Clean bungs with warm water and store with your Paint Guard for future use

Safety Tips

🪜

Ladder Safety

As most downlights are installed on ceilings, step ladders are often used. Ensure the ladder is positioned correctly on level ground and, if necessary, have someone steady it to avoid accidents. Always maintain three points of contact when climbing.

🛡

Avoid Scratching

When removing the Paint Guard, be careful not to scratch the ceiling surface. Use gentle, controlled movements and avoid using excessive force. The device is designed for easy removal when handled properly.

Benefits of Using Paint Guard

No Masking Tape

Eliminates the hassle and time consumption of using masking tape around downlights. No more tedious taping and cleanup.

Reusable

The Paint Guard can be cleaned and reused multiple times, making it an environmentally friendly and cost-effective solution.

Time-Saving

Saves up to 5-6 minutes per light per coat of paint. Multiply this across multiple lights and coats for significant time savings.

Efficient Design

Patented design ensures a snug fit and effective protection. Professional results with minimal effort required.